
Laboratory 5/10/20T Manual Hydraulic Hot Flat Vulcanizer Press Machine For Rubber Vulcanizing
Overview
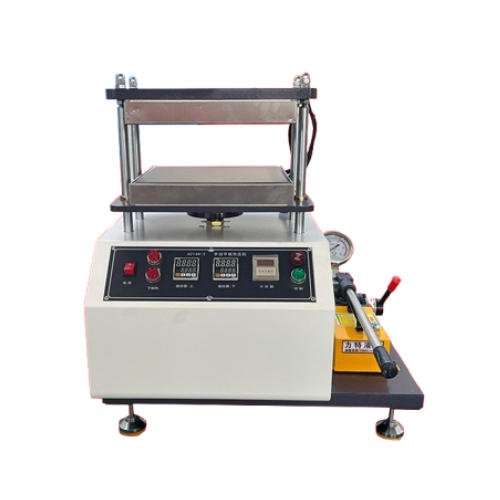
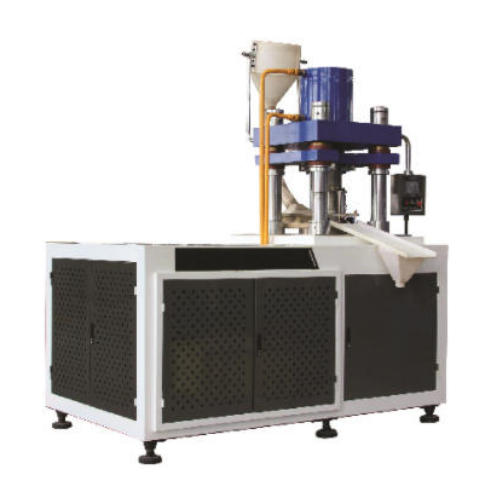
This series of plate vulcanizing presses is primarily used for molding various rubber model and non-model products. It can also be employed for pressing thermosetting plastics and foamed rubber-plastic products. Equipped with independent power mechanisms and electrical systems, the machine adopts centralized button control. Both working pressure and heating temperature can be adjusted within a certain range. This model is available in manual and semi-automatic versions.
Heating Plate Features
Made of imported high-temperature-resistant steel, the surface undergoes deep carbonization, hard chrome plating, and other processes, ensuring fast heat transfer, rapid cooling, corrosion resistance, high hardness, and minimal deformation. The built-in heaters and temperature sensors at the back provide high power, quick heating, sensitive and uniform temperature measurement, and a small temperature error range.
Guide Columns
Four hardened and precisely positioned columns, along with hydraulic cylinders, are supported by a thick steel plate base of the entire control box. The hydraulic platform slides smoothly and noiselessly on self-lubricating bronze bearings along the columns. The top and rear of the press are enclosed with heavy-duty steel, providing additional safety protection for operators. The upper layer consists of steel plates with built-in thermocouples inserted near the surface.
Technical parameters
Model | 6014H-5 | 6014H-10 | 6014H-20 |
Pressure capacity | 5T | 10T | 20T |
Pressure gauge | The hydraulic gauge is manually controlled for pressure | ||
Pressure plate size (mm metric) | 250*250/300*300/350*350/400*400/450*450/500*500 mm | ||
Material of hot press plate | High-temperature resistant imported steel plate, surface carbonized and quenched, special treatment for fast heat conduction, no deformation under parallel pressure, wear-resistant | ||
Hardness of the pressure plate | 50~60HRC | ||
Flatness of the pressure plate | ≤ 0.03 mm | ||
Flatness of the pressure plate | ≤ 0.16 mm | ||
Temperature range | Room temperature -250℃ [Customizable maximum temperature: 500 ℃] | ||
Temperature uniformity | 1.5℃ [The larger the pressure plate, the higher the temperature and the worse the temperature uniformity.] | ||
Temperature controller | Two Omron temperature controllers | ||
Temperature control method | PID self-tuning in combination with high-precision sensors ensures temperature control accuracy of ±1.0℃. | ||
Timer | The LED time range is 0.1s - 99 minutes - 9.9 hours | ||
Heater | The heating mold is built-in cylindrical | ||
Heating time | It takes approximately 15 minutes from room temperature to 160℃ | ||
Two hot plates | The temperature of the hot plate can be set separately | ||
Heating method | Electric heating | ||
Cooling method | Natural cooling | ||
Cylinder stroke | Max 100mm [customizable | ||
Cylinder speed | 5mm/s [Manual] | ||
Pressure gauge | 0~200kg/sq.cm | ||
Mold opening method | Manual ascent and descent | ||
Host volume (mm) | 400x550x600 | 500x550x600 | 550x550x600 |
Power supply voltage | 3 phase, AC220V | 3 phase, AC220V | 3 phase, AC220V |
Overall weight of the machine | About 150kg | About 270kg | About 350kg |
Operation methods
1. First, level the testing machine by placing a spirit level on the machine base and adjusting the foundation screws according to the level indication until the machine is horizontal (perform this step when installing or relocating the machine).
2. Turn on the main power switch to supply power to all control panels of the machine.
3. Set the required testing temperature.
4. Set the temperatures for the upper, middle-upper, middle-lower, and lower molds according to the sample requirements. Once the temperatures reach the set values, open the cylinder door and place the isolating stainless steel plate and the sample.
5. Press the test start button to initiate the test by raising the hydraulic cylinder (do not adjust the hydraulic system pressure and speed arbitrarily).
6. The system will automatically reset after reaching the set time.
7. Observe the sample condition to conclude the test.
Precautions
1. Connect the power for the machine's display and motor according to the indicated labels.
2. Operators must be thoroughly familiar with the operation and maintenance procedures of this machine and exercise caution during use.
3. The placement environment must be kept clean and dry.
4. When relocating the machine, handle it with care during transport to avoid damaging any components.
5. Use caution when installing or removing fixtures to prevent them from falling and damaging machine parts.
6. Regularly inspect the drive belt for looseness and adjust it as necessary.
7. Please apply for periodic inspection and calibration to ensure accuracy.
Maintenance
1. Machine Body: Regularly wipe the exterior to keep it clean.
2. Plated Parts: Wipe with machine oil to prevent rust and maintain brightness.
3. Drive Screw and Screw Areas: Apply lubricating oil to ensure smooth transmission. (A mixture of grease with a small amount of machine oil can be used as lubricant.)
4. Control Panel (Control Box and Display): Wipe with a dry cloth. Strictly prevent contact with water to avoid damaging the IC electronic components.
5. All fixtures and connector accessories should be stored properly and coated with anti-rust oil to prevent corrosion.
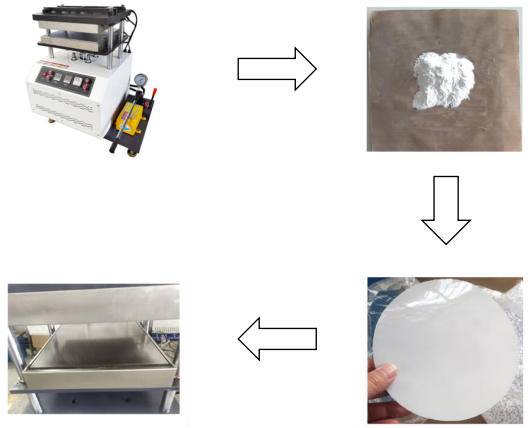
Sample display